Creating Documents
Each document has an unique ID. This ID is created from a word of your choice and a system-generated number which is attached to the word.
To create a new document, proceed as follows:
- Select a document type from the New-Menu
in the toolbar (e.g. Story)
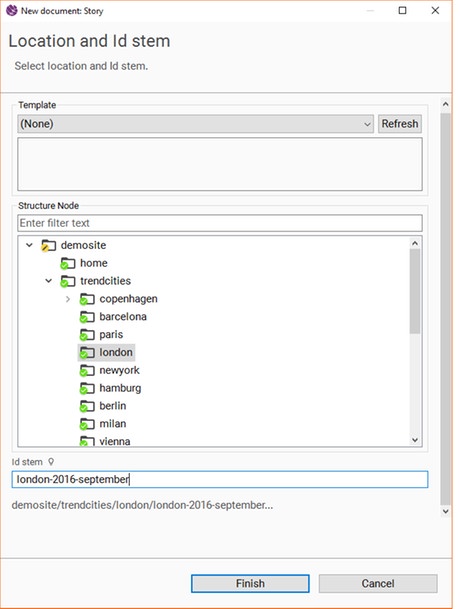
- Select a location - In the emerging dialog, you will have to pick the structure node you want to add the new document to.
- Select an Id stem - enter a character string which describes the document's topic. The Id stem may consist of letters from the latin alphabet and digits from 0 to 9 (not at the end of the Id stem). Blanks are not permitted; thus, if you want to use an Id consisting of multiple words, you have to separate them using hyphens (-) or underscores ( _ ). Every other type of special characters or brackets are also not permitted.
After saving the new document, an automatically generated sequel of digits will be added to the Id stem; e.g. london might become london100. This is the Sophora Id of the document. You can later change the Id stem via the entry Change Id stem in the document editor's menu. This will also change the Sophora Id. The document's Sophora Id will be used in the delivery. Consequently, the web address of the document in the screenshot will be http://demo.sophoracms.com/trendcities/london/london-2016-september100.html.
Creating Documents from Templates
Templates can be used to create new documents from existing documents. If the template does already contain content, it will be copied into the new document. Templates also can specify an ID stem and/or a structure node, which will be adopted by the new document from its template. However, you can immediately or afterwards edit all contents, ID stems or structure nodes, that have been inherited from a template.
In the search view as well as in the opened documents view and in any document tooltip, templates will be displayed with a striped background. The document editor of a template will also have a striped background.
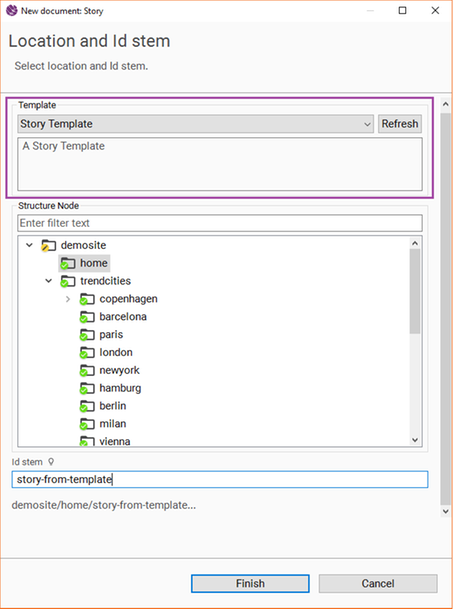
To create a document as an instance of a template, open the New Document wizard as if you would like to create a regular new document. Then, in the template drop-down, select the template you wish to use.
Creating Templates
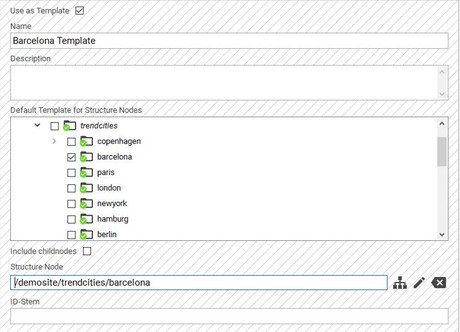
To create a document template from an existing document, open the existing document first. Then, on the Template tab, activate the checkbox Use as template, and enter a name for the template. These changes convert the document into a template. You can also provide an ID stem and a structure node path for documents created from the template. Additionally, you can choose the structure nodes where the current document should be used as a default template; if you create a new document in one of these structure nodes afterwards, this template will be selected by default in the New-Document-Dialog.
However, save for the name, which will be displayed in the New-Document-Dialog while choosing a template, all of these fields are not mandatory.
To create a new document template (not from an existing document), just create a new document of the desired type, then follow the steps above. To revert a document from being a template into a regular document, just uncheck the checkbox Use as template.
Field Validation
Property fields in document templates need not necessarily be valid. This means that, for example, a mandatory "Headline" field does not need to be filled in order for the document template to be saved. This does not apply to documents created from templates, so in those documents, the field would have to be filled again.
Configuration
To use document templates, follow these steps to configure them:
- Create a new "Template" tab document, and activate all document types that should be usable as templates.
- Open all of the document types from point 1. and add the mixin sophora-mix:documentTemplate to them.
- In those same document types, add the existing "Template" property field group to the "Template" tab.
Now you should be able to see the template properties on the "Template" tab in those documents, and use document templates as outlined in "Creating Templates".
Additionally a special search for all templates can be provided to the users by adding the valueAll templates;§[@sophora:isDocumentTemplate='true' and not(@sophora:isDeleted='true')]
to the search.modifiers key of the configuration document in the administration view.
Importing Documents
You can also import already existing documents. Therefore, click ![]() (Tools) in the main toolbar and select Import...
(Tools) in the main toolbar and select Import...
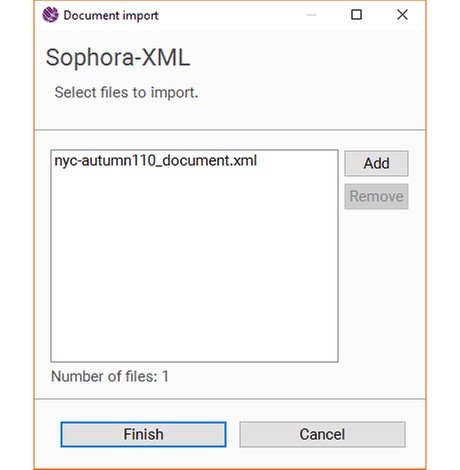
Sophora XML required: Only documents containing valid Sophora XML are imported. A specification of such XML can be found within the Importer Documentation.
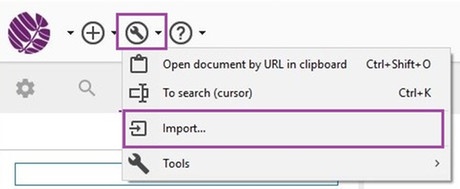
Within the emerging dialog, you will be asked to select the documents you want to import.
After the import of the documents, you will receive a report about the success of the import. If there occurred any errors while importing the documents, you will be informed about it.
Document Editor
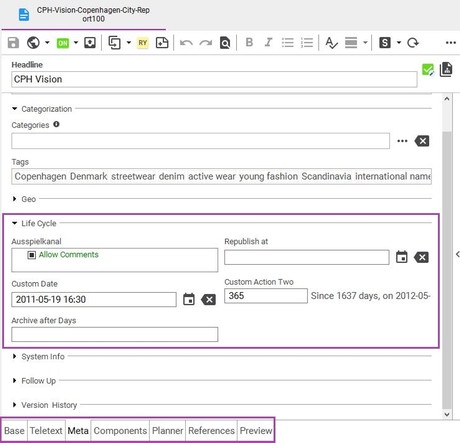
The Document Editor ist the heart of the Sophora DeskClient. With the editor's assistance, you may edit the text of a document, change the time scheduling of a document or addd components. The editor is structured by several tabs; input fields are situated on the tabs. You can switch tabs at the bottom of the editor (see illustration). The administrator is able to configure which input field shall be found on which tab. Input fields with labels in bold characters are mandatory fields. You cannot save a document without filling these fields.
You can find a detailed documentation about the Text Editor here.
Base Tab
Here you will find the document's basic information (which usually is the content itself) and the text editor.
Metadata Tab
This tab contains meta-information about the document. Note, that some of the fields which appear here are automatically created by Sophora. These fields are grey and cannot be modified.
These fields include for instance the creator of the document or its modification date.
Editor Toolbar
You can select all actions relevant for editing the document using the editor toolbar (see upper branding in the illustration). There, you can mark text as bold, publish or propose the document and much more. Also mind the three dots in the upper right corner of the document editor - the dropdown menu offers further actions.
Search and Replace [search-replace]
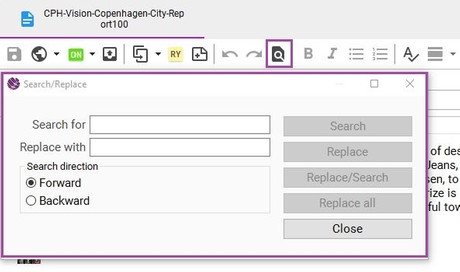
You can search the entire document for a text. The search ignores lower and upper case and also finds text parts inside words. The matches are highlighted in the editor and are listed in a separate area named Search in Document . The results are grouped by editor tabs and form fields.
To start a search, open the dialog "Search/Replace" with the shortcut Ctrl + F or click on the icon in the editor toolbar (see illustration), and enter a text. By clicking on the Search button, you can start a new search. A further click on the button navigates to the next match. To clear a search result, use the respective entry from the dots-menu in the top right corner of the Search in Document view.
The found matches can be replaced with another text using the dialog. By clicking on the Replace button, you can replace individual as well as multiple selected matches. Clicking on Replace/Search will replace the selected match and instantly select the next match. By clicking on the Replace all button, you can replace all matches at once.
Saving, Releasing and Publishing

- Saving: To display current changes in the preview you need to save the document. Those changes will not be published automatically.
- Releasing: (Not available in every DeskClient configuration): This document status is used by editorial journalists who do not have the permission to publish documents themselves. After they finished their work, they can release a document and mark it as finished. Then, a supervisor can review and publish it.
- Publishing: Publishing a document triggers its delivery to the live server. The deployment only takes a couple of seconds. The document will then be in the published state.
- Depending on the configuration of your Sophora installation and your user permissions, instead of direct publishing, the document may be moved to the released state, the scheduled publication state, or the pre-published state.
Automated Publishing
Documents may also be set to be automatically published at a future date. To schedule an automated publication of a document, fill out the field "Publish at" (located on the Meta tab within the document editor) and then publish the document. Note that if you do not have the permission to schedule an automatic publication, you may not be able to edit this field.
List of all Possible Document States within Sophora
A document can be in a variety of different states. Every state has a corresponding icon, so you can see a document's state at a glance. These icons can also appear in combinations. A complete list of document state icons can be found here.
Time Scheduling for Documents
The timing schedule for a single document is usually defined on the Meta tab. Here, you might find the properties Online from, Online until, Days until offline and Days until archive as well as additional custom fields concerning a document's lifecycle. Note, that the availability of the fields just mentioned strongly depends on the actual set-up of your Sophora installation. Also note, that the Planner tab does not refer to the document opened in the editor but its components.
Representation: The values of relative timing properties together with the corresponding reference date property are displayed in grey font, if the document inherits these values from its structure node. You may override such inherited values and when you do so, the font colour changes to black. To suppress the inheritance of structure node values, insert a minus sign ("-") instead. A greyed out minus signals that the superior structure node has interrupted the inheritance hierarchy. If a conflict occures between the values of "Days until offline" and "Online until", the latter will be preferred.
Custom fields that relate to a reference date come along with an additional label which contains the name of the according date field as well as the number of remaining days.
Note that changes to these options need to be published in order to be active.
Protection of Documents
The Sophora DeskClient enables you to protect whole documents, as well as single contents against modifications. This can be useful to prevent fields from changes through imports or to signalize other users that some fields should not be changed without further ado.
If the protection of fields is not possible in a document type, the protection first must be approved by an administrator.
Protecting a Document
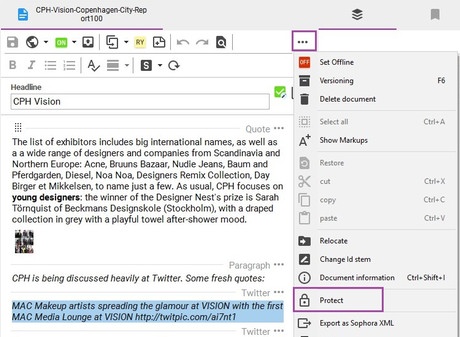
To protect the whole document against modifications, select the menu entry Protect from the dots menu in the editor toolbar. To remove this protection again, click on the same menu entry. If the document is protected, the lock symbol is shaded in blue. You can recognize protected documents by the notification in the editor's upper area as well as the lock icon next to the document's status icon.
Protection of Properties
Single fields of a document can be protected from an automatic update by the importer. A protected field is in read-only mode and therefore cannot be changed. It is necessary to revoke the protection in order to alter the property.
To protect a single property, open the context menu by right-clicking on the label of the field. To unprotect a field again you need to operate in the same way. The content of an unprotected field will be shown grey and a lock icon will appear next to the field.
