You can create a Search Agent for your latest search. The Search Agent executes this search in a regular interval. Found documents are initially marked unread. After opening a document out of the Search Agent view it is marked as read. You can also mark individual found documents as read as well as a whole Search Agent.
Search Agents can be grouped together in folders.
The Search Agents view displays the sum of all unread search results of all Search Agents in all folders. If you mouse over the Search Agent view's top, a tooltip informs you about the count of unread documents in total.

Display Modes
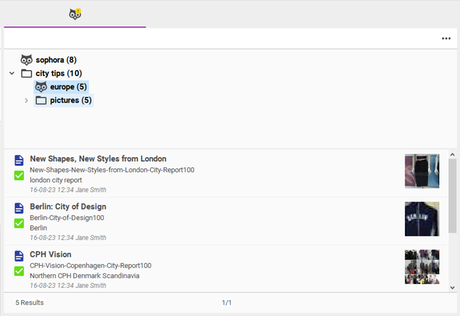
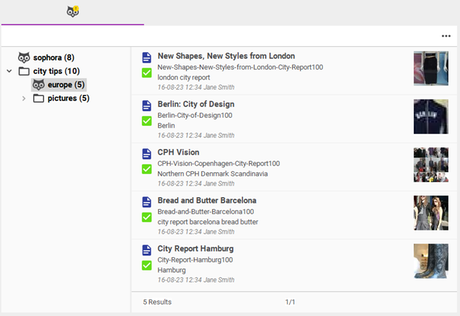
By default, the view shows a vertical layout. In this layout, the tree will be shown on the upper side while the search results are located on the down side. However, you can also choose a horizontal layout via the dots-menu in the view's upper right corner. This way the tree will be located on the right side and the seach results on the left side.
Besides, you can choose between three different display modes - Single-line, Compact and Gallery - similar to the search view. You can equally access them via the dots-menu.

Creating New Search Agents
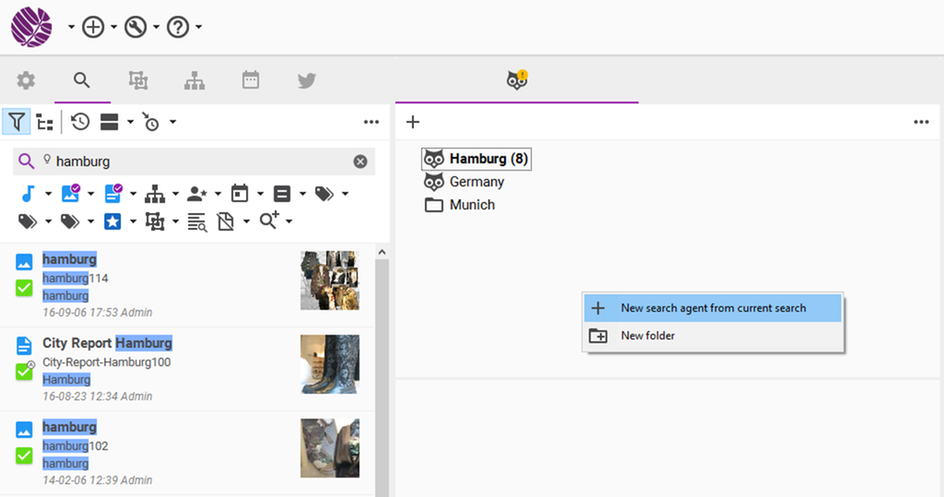
In order to create a new Search Agent, you need to execute a search beforehand. The latest search will be used for the Search Agent.
By a simple right click on the left part of the Search Agent view you need to choose New search agent from the current search. Afterwards you are prompted for a name.

Organizing Search Agents
You can create folders to group Search Agents. Folders can contain folders and Search Agents. Thus, you can create an arbitrary hierarchy. Folders can be created in the left part of the Search Agents area using the button from the context menu. You are prompted to name the folder. If you want to create a folder on top level use the button in the dots-menu on the upper right of the Search Agent view, otherwise the folder will be created based on the selection in the tree (under a selected folder or beneath a selected Search Agent). You can rearrange the whole tree using Drag and Drop.
Newly found documents will be marked as unread. Opening a document from the Search Agent view will mark it as read. You can also do that by selecting Mark as read from the context menu. Conversely, you can likewise mark read documents as unread again. If you want a document no longer to be listed in the Search Agent results, you can remove it by selecting Remove from search agent. Removed documents will not show up again until they are modified. Note, that these actions only apply to one particular Search Agent - a document removed from one Search Agent will still remain in all other Search Agents (provided it matches the search criteria).
You can also mark a complete Search Agent or folder as read/unread by selecting the appropriate menu entry Mark all as read or Mark all as unread.
It is also possible to replace the search queries of existing Search Agents by the current search. You can do so by choosing the context menu entry Use current search. You can also trigger a Search Agent as a search in the search view.