What are Image Documents?
In Sophora, images are documents. Image documents can be used multiple times in the text of a another document and as components of documents. Image documents have meta data.
Image documents do not only consist of a single image file but have several variants. For example, image variants can include teaser images, a large text image and a small text image. The appropriate variant of an image will be displayed based on the context. The standard workflow is to create an image document using one original image, from which all image variants are automatically cropped and generated.
Sophora supports JPG und PNG. Use a good quality picture as it will be used to generate the image variants. GIF and SVGs are possible, too.
Creating a New Image Document
Since images are documents, follow the standard process to create documents.
Uploading A (New) Image
To upload a new image file:
- In a newly created or existing image document, click Upload Image.
- Select an image file from your local file system.
- Save the image document. Sophora now defines all image variants for this image*
Setting The Focal Point For All Image Variants
The Sophora MobileClient enables you to set a focal point for all image variants for a single image. This will cause the delivery to generate the variant binary data around this point.
Setting the focal point is done on the actual image object within the document form.
If there is yet a focal point defined for the image a crosshais symbol will mark its location. If no crosshair is shown there is no common focal point. This is the case when their variants are individually cropped. You can click the button "Set Focal Point" to enable setting a focal point but this will overwrite all individually defined cropping data!
When setting the focal point is possible you can just click on a point of the image. The crosshair will mark the focal point. After setting the focal point you have to save the image document.
Fine Grained Image Cropping
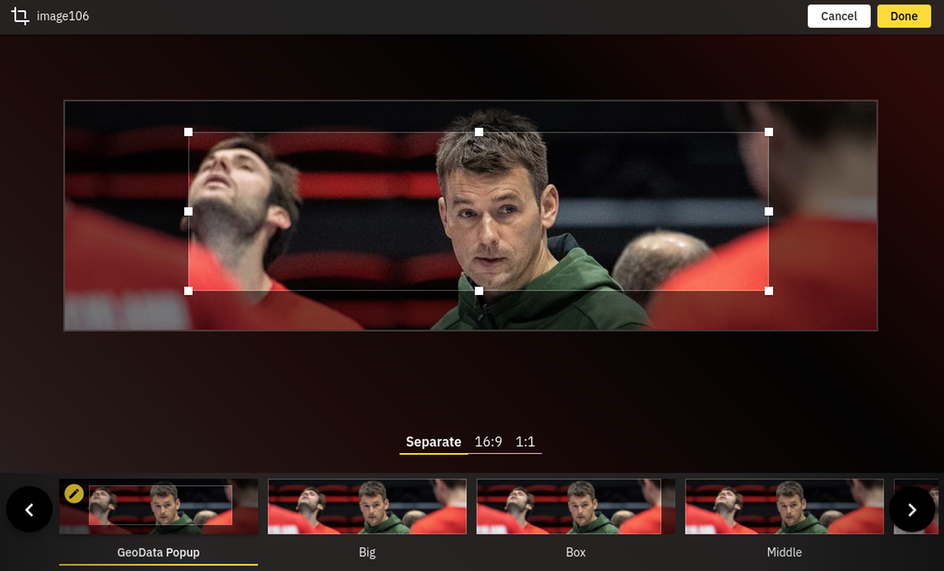
If you want more control over the image variants you can click the "crop" button on the bottom right corner of the image. This opens a full screen crop view of the image and all its variants.
The top section shows the currently cropped variant (or variants, if several variants of the same aspect ratio are cropped at once). Click and drag inside the bright area to move the whole selected cropping area or click and drag one of the handles at the sides and corners to resize the cropping area. The Mobile Client however will only let you crop the image according to what the image variant definition allows you to do.
The bottom section allows you to select from the available variants. If there are several variants with the same aspect ratio you can select one of the groupings as well. A pencil icon will mark all variants that have been modified since opening the image cropper.
When you are done, click "Done" on the top right corner to apply your changes to the document or "Cancel" to dismiss them.
When changes have been made you still have to save the document.
